Security in Obscurity
A thought by Jeff Stein
Constructing a Website with AWS: Beyond S3 (Part 2)
The low overhead with AWS has been nice to effectively manage my blog, June 2019
When examining the option to construct a website with AWS I have found that the low overhead has been nice in order to effectively manage my blog and I have discovered that I have not had to sacrifice security in the process. I am able to leverage HTTPS across my site as well as effectively control access to content. I have even been able to build a mini CICD pipeline in the process. This thought focuses on going beyond just building your site out in an S3 bucket and is focused on injecting security into your website as well as better efficiencies and is a part of a two part series on constructing a static site using AWS which includes:
Getting Started and S3 Configuration
Beyond S3
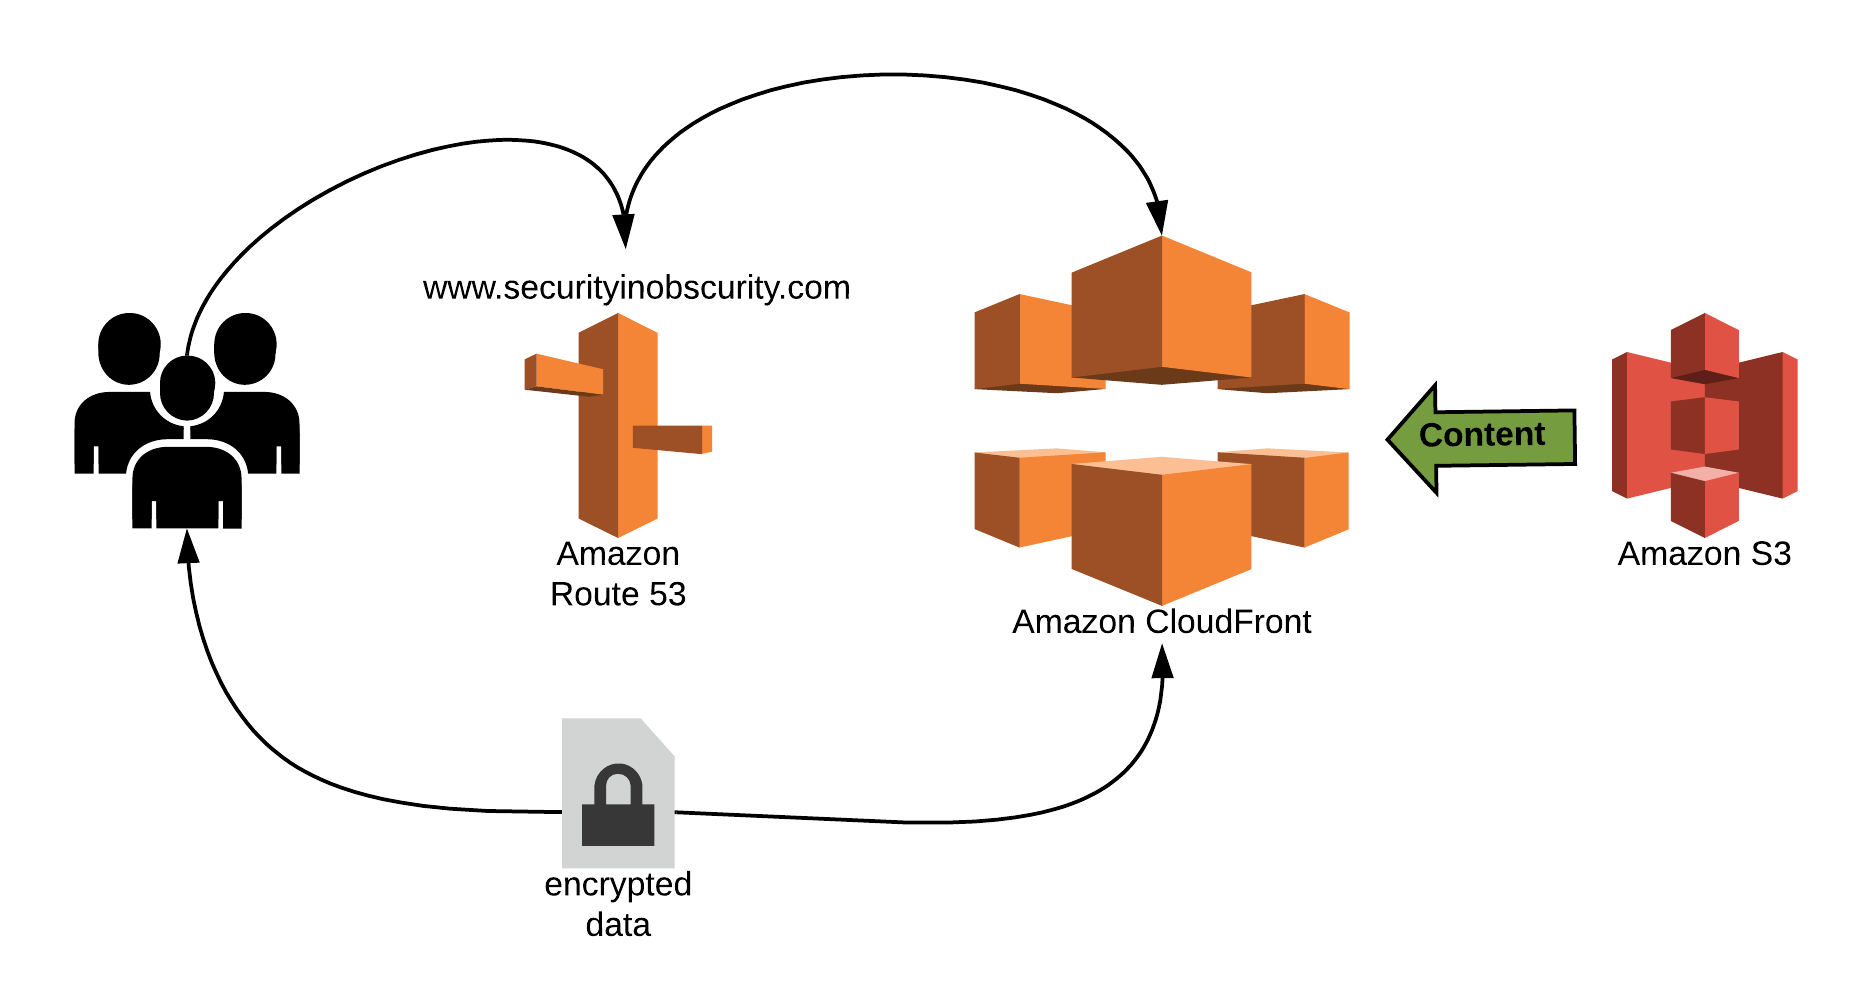
As mentioned in the first part of the series, the core of my site is leveraging static HTML pages hosted on S3 buckets. The content is then distributed using a CDN utilizing Amazon CloudFront so that it is highly available. Additionally DNS is used to allow for visitors of the site to access it without having to use the direct S3 bucket URL and HTTPS is leveraged to ensure data is encrypted in transit. Below again is a diagram illustrating how the concepts function.
CDN
To add better functionality and prepare our website for HTTPS we will want to leverage the AWS CDN, CloudFront. This service can be used to distribute your content throughout the global without relaying on website visitors to access your S3 bucket directly. The service will enhance performance of your site by visitors receiving the content from datacenters in CloudFront that have the lowest latency to their physical location [1]. Additionally, unlike S3 buckets, CloudFront supports signed certificates. This means that once enabled you have the ability to leverage HTTPS on your site rather than HTTP.
To get started with connecting your S3 bucket with a CDN you will want to associate it as an origin with CloudFront. To do this verify your S3 bucket address which can be found as the endpoint name in the "Static website hosting" section of your S3 bucket properties. With your endpoint address in mind, navigate to AWS CloudFront. Select to create a "New Distribution" and choose your S3 endpoint address as the Origin Domain Name in the "Origin Settings" while setting up the distribution.
Once you have created your bucket you will want to upload all of your files to S3 under your root folder. I recommeAdditionally I recommend to choose to HTTPS only as your "Viewer Protocol Policy" for the CDN (more on this later in the thought) and select GET, HEAD for the Allowed HTTP methods. Finally ensure that you have added in under the Alternative Domain Names section your website domain which you would like to register or already own. We will cover how to handle this names in the next section of the thought.
DNS
In order to move away from the long naming syntax associated with your S3 bucket housing your static web content you will want to leverage Route 53. Route 53 is the AWS DNS server provided as a managed solution. Before you set up your DNS recorded in Route 53 you will want to create your domain name.
Navigate to the Route 53 service and on the dashboard type in the domain name you would like to register. Clicking "check" will allow AWS to validate that the name is not being leveraged already and AWS will give you the option to add the domain to your cart. You can then click "continue" and fill out the form to register the domain with AWS.
Once you have your domain name registered AWS will automatically create a hosted zone in Route 53 for the domain name. You should see SOA and NS records already provisioned for the zone. To leverage your domain with your CloudFront distribution you will want to create CNAME records to direct visitors of your website domain, to the CDN distribution. In your Route 53 hosted zone select "Create Record Set" and set the record type to CNAME.
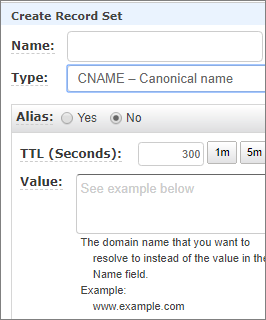
You will then grab your CloudFront URL which will end in .cloudfront.net and paste the full URL into the value box. Select to create your record. You can now leverage your domain with your CDN and static hosted site in S3.
Enabling HTTPS
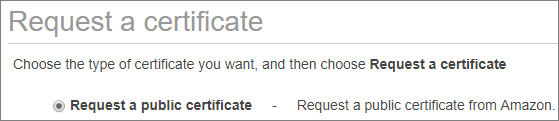
My final recommendation for leveraging AWS with your site is to generate a SSL certificate for your CloudFront distribution. This will ensure that traffic to and from your site travels over HTTPS. CloudFront will support signed certificates from public certificate authorities (CA) such as DigiCert or Symantec as well as the AWS Certificate Manager (ACM) [2]. Assuming you do not have an existing account with a public CA, navigate to ACM from the AWS console.
Select "Request a certificate" and make sure you choose a public certificate.
You will want to add your domain name to the certificate and similar to creating a domain name, complete the fields to generate the certificate. Note that in order to create the certificate you will need to validate you own the domain for which you are trying to generate a certificate for. This can be done via email if you have an email address associated with the domain or by adding a DNS record in Route 53 to your hosted zone.
Once your certificate has been generated you can now leverage it with your CloudFront distribution. Back in CloudFront navigate to your distribution and edit the configuration. Choose a custom SSL certification and you will be able to select your newly signed certificate.

You now have configured HTTPS on your CloudFront distribution and all traffic sent to your site can transmit over HTTPS.
AWS can be a very cost effective method for hosting a website. In addition to hosting static content with an S3 bucket there are a variety of tools at your disposal with AWS to improve the performance of your site as well as make it more secure. From leveraging CloudFront as a CDN to utilizing AWS Certificate Manager to enable HTTPS for the site, the added feature set with AWS helps reduce the overall surface area required to secure.
Resources Consulted
[1] What Is Amazon CloudFront? (n.d.). Retrieved from Article Link.
[2] Requirements for Using SSL/TLS Certificates with CloudFront (n.d.). Retrieved from Article Link.
Tags
Security Vulnerabilities IDS/IPS Malware Ethical Hacking Policies PowerShell Python Splunk Cloud Script PKI Firewall Router Vulnerability Management